
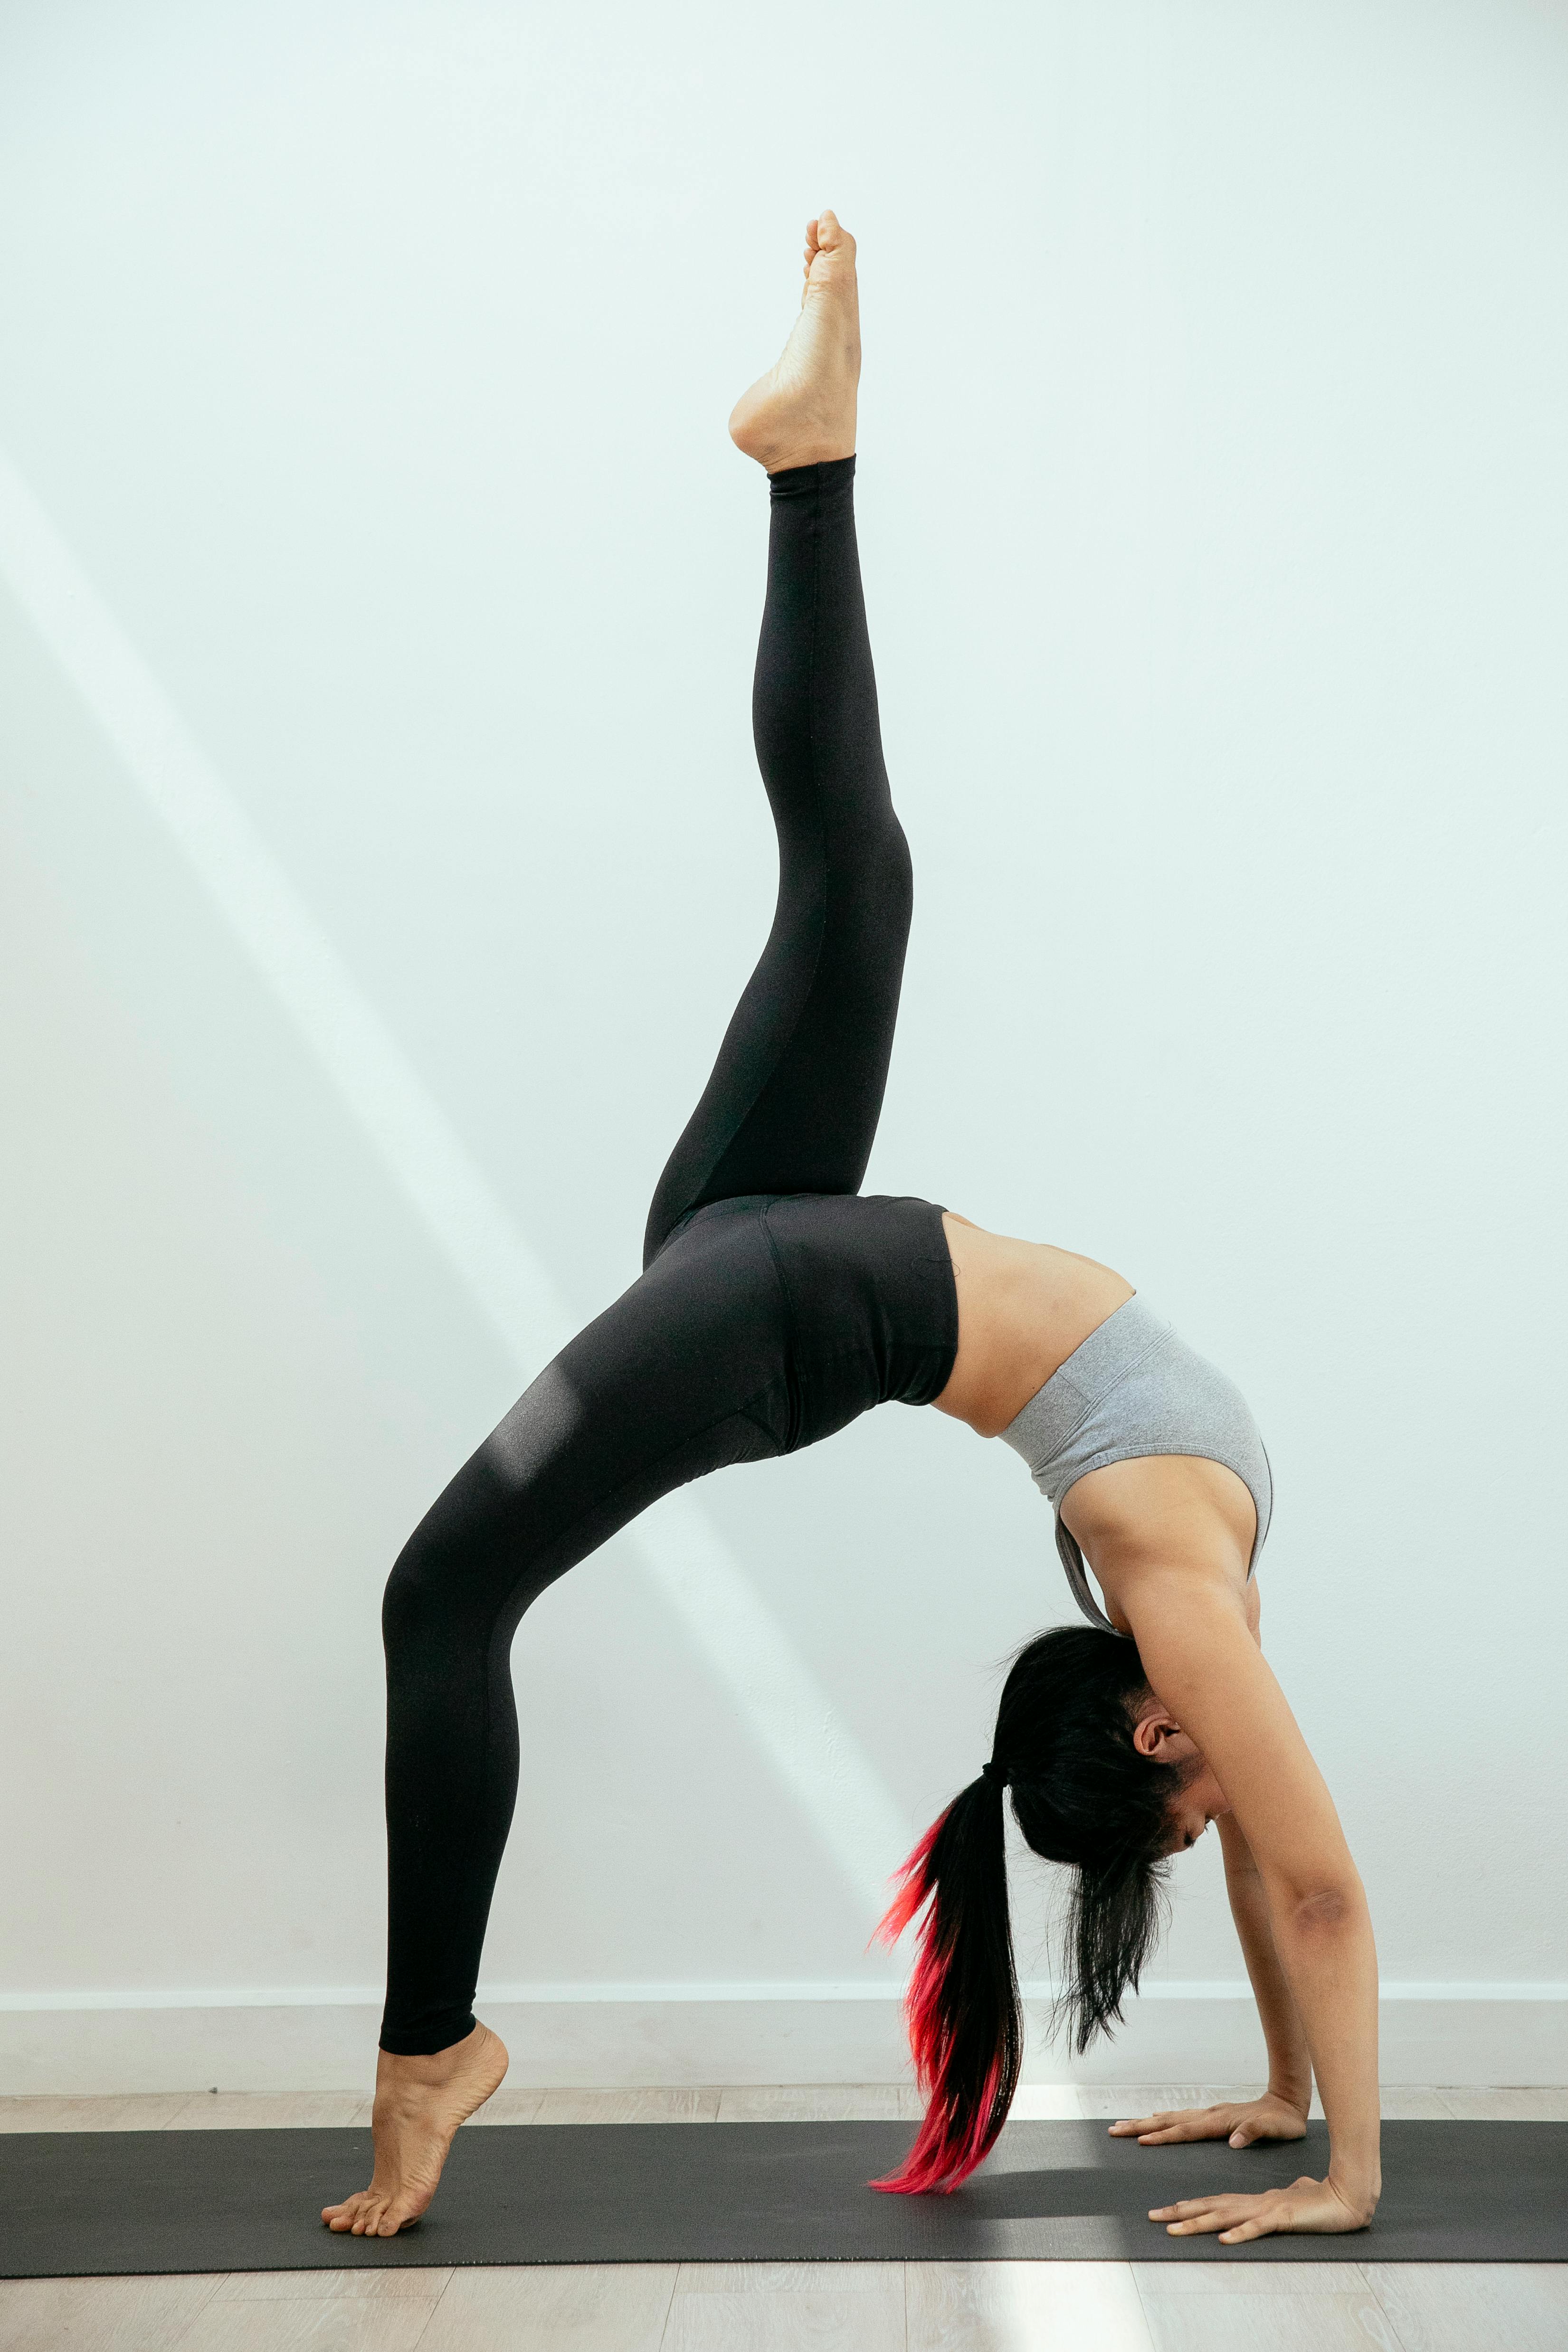
Wheel pose (chakrasana or urdva dhanurasana) can be challenging because it requires coordination and participation of the entire body. It asks for but also enhances strength and flexibility of the spine, quadriceps, abdomen, hips, glutes, chest, shoulders, arms, and wrists.
However, it’s very important to build up to demanding asanas like wheel pose. Since you’re asking a lot from different parts of your body at once, take it slowly to ensure stability and reduce the risk of injury. So, let us help guide you to wheel pose safely!
In this post, we’ll take a quick look at the benefits of wheel pose before delving into how to prepare your body and mind for this challenging asana, tips and steps to guide you, and a selection of classes by our beloved instructors that can help you get a taste of this wonderful heart-opener.
Benefits of Wheel Pose
Your body may particularly appreciate wheel pose—and the journey to get there—if you spend a lot of time driving or working at a desk, because, among this asana’s many benefits, practicing wheel pose:
- Opens the shoulders and upper back
- Opens the chest and stretches the lungs, which can increase lung capacity, aid diaphragm movement, and maximize oxygen intake.
- Builds stamina (if you can do it longer)
- Improves flexibility of the shoulders
- Stretches the abdominals, pectorals and quadricep muscles
- May improve blood circulation
- Promotes spinal flexibility
- Can promote better posture by opening the chest and strengthening the back
- Builds physical and mental awareness (as can any yoga asana)
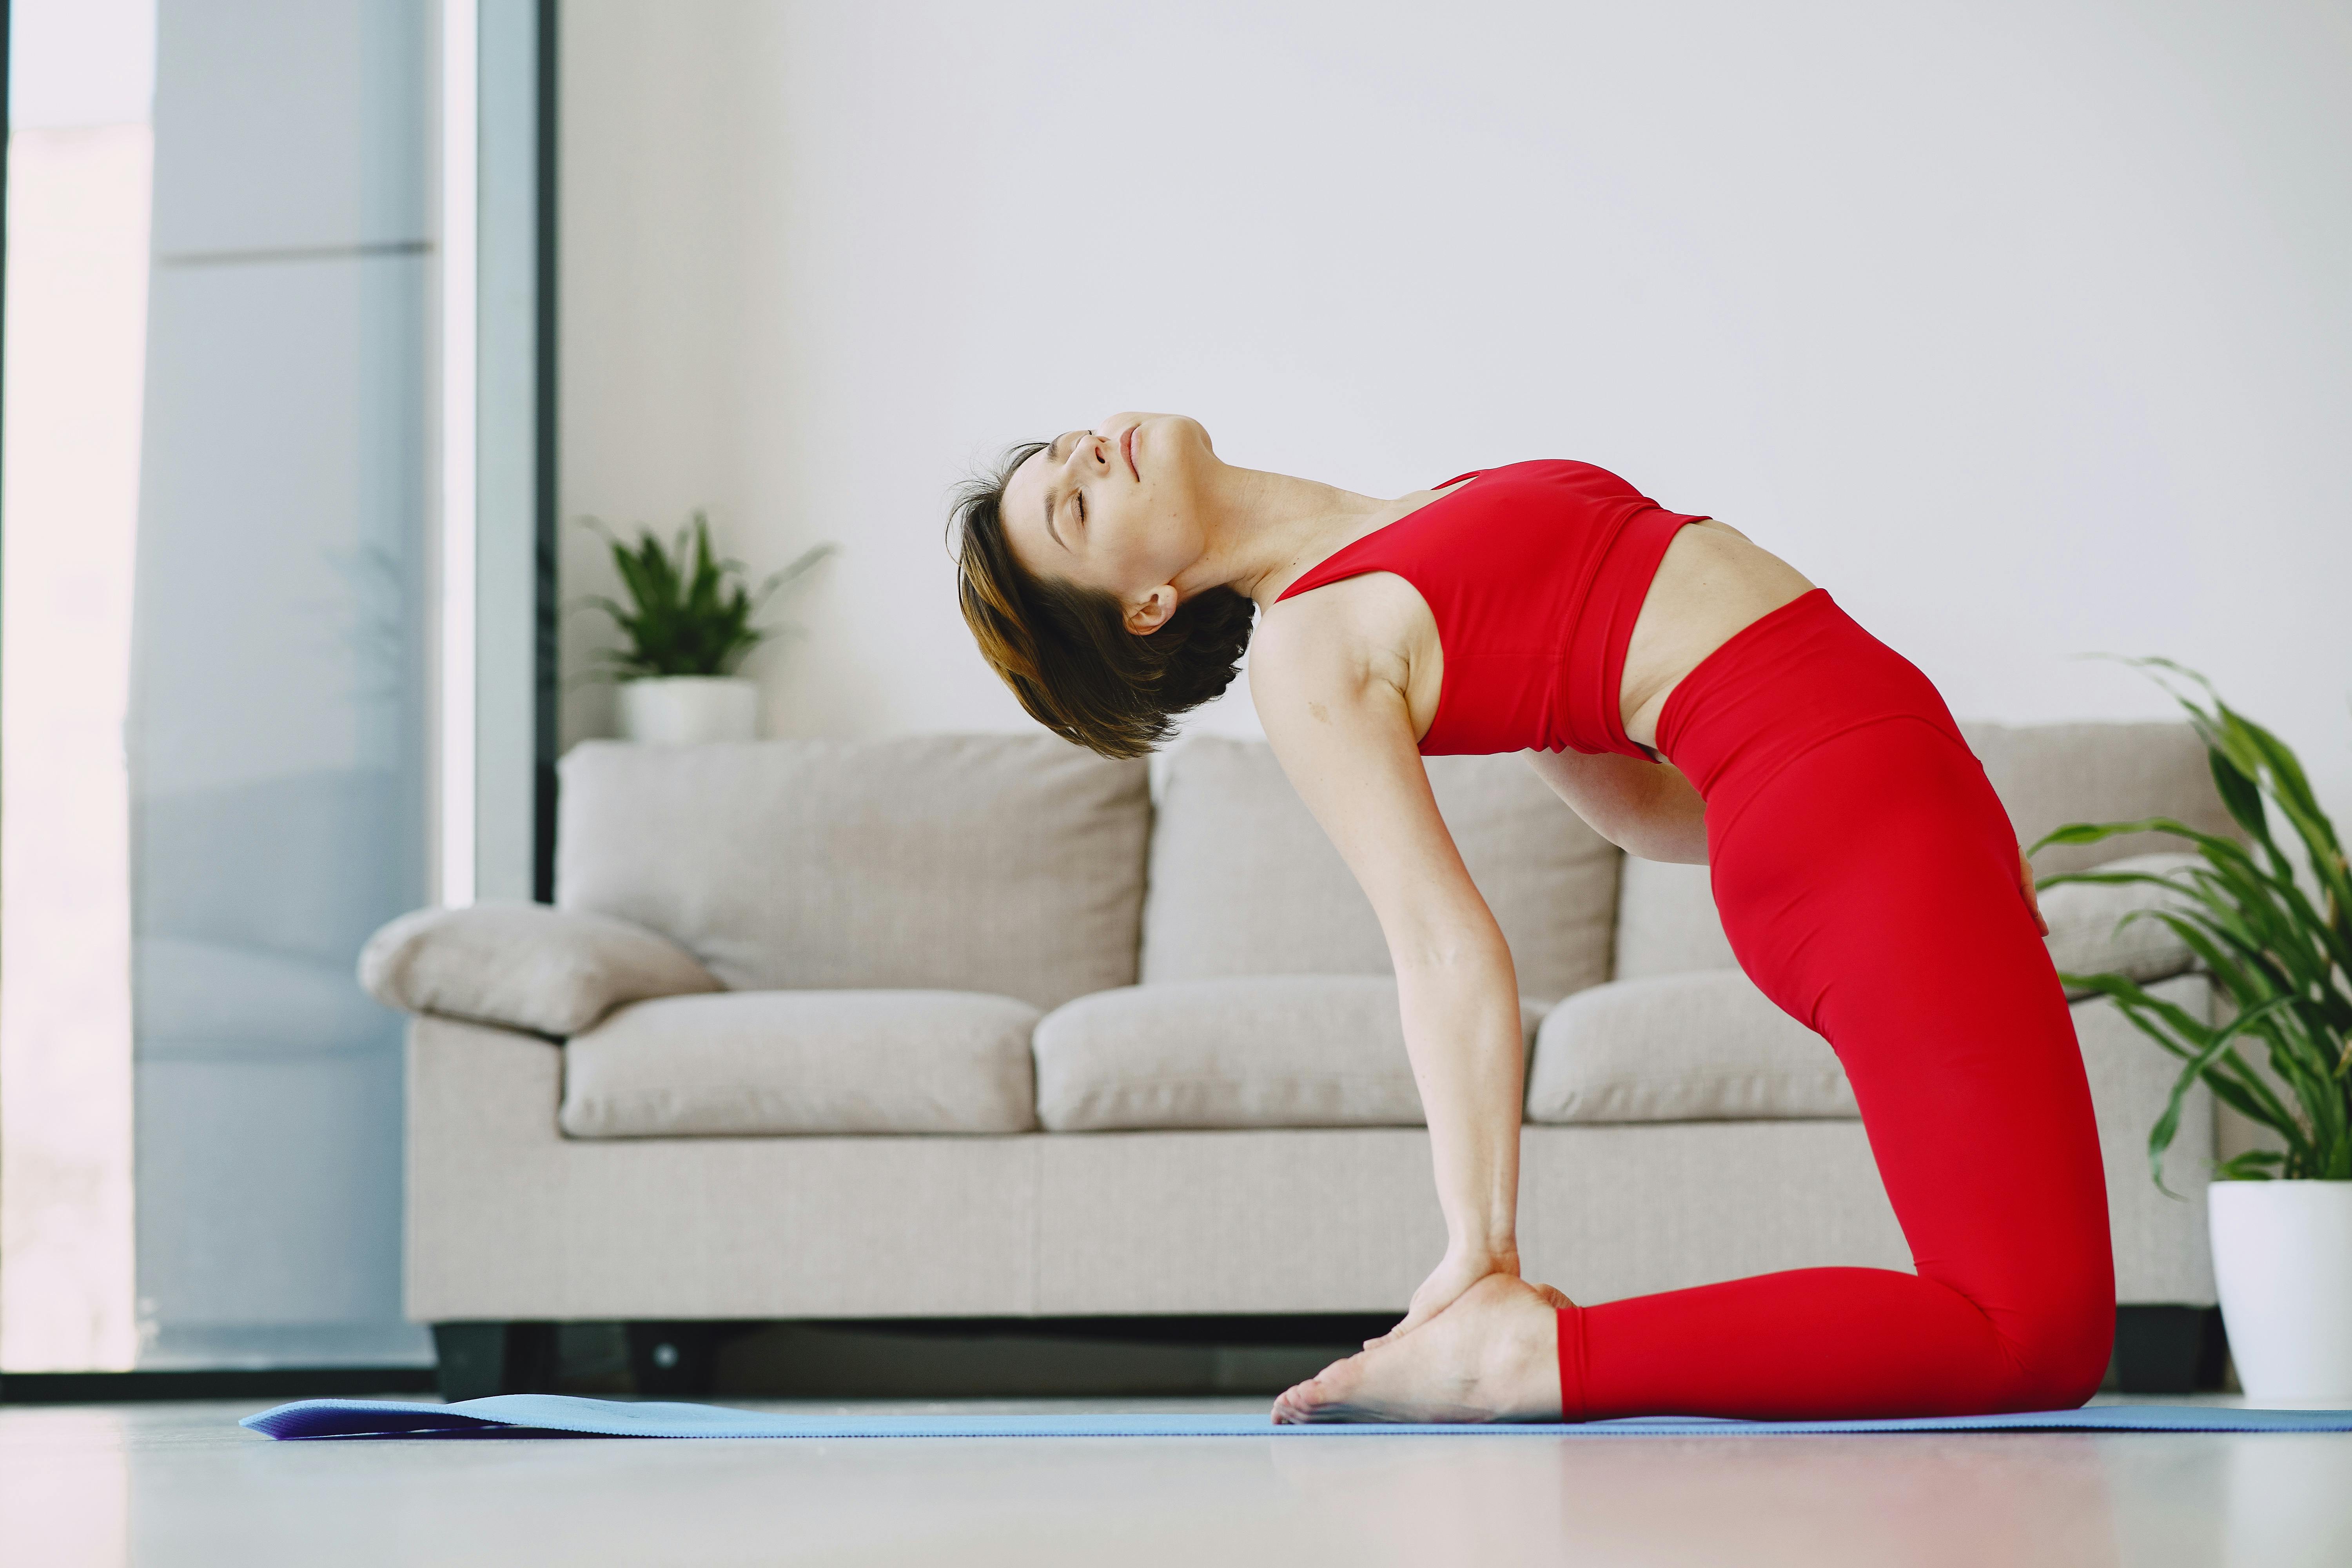
Warming Up for Wheel Pose
Wheel pose is a challenging backbend that relies upon harmony, strength, and flexibility throughout your body.
A peaceful, balanced mind will help too, so you might want to start your practice with a gentle meditation.
To tailor a practice that culminates with wheel pose before cooldown and savasana, you can go through a vinyasa or hatha flow that contains the following asanas.
Note that these asanas can help you warm up and build strength and flexibility, as well as build awareness of your body, particularly your core, which will be helpful as you progress toward this profound backbend.
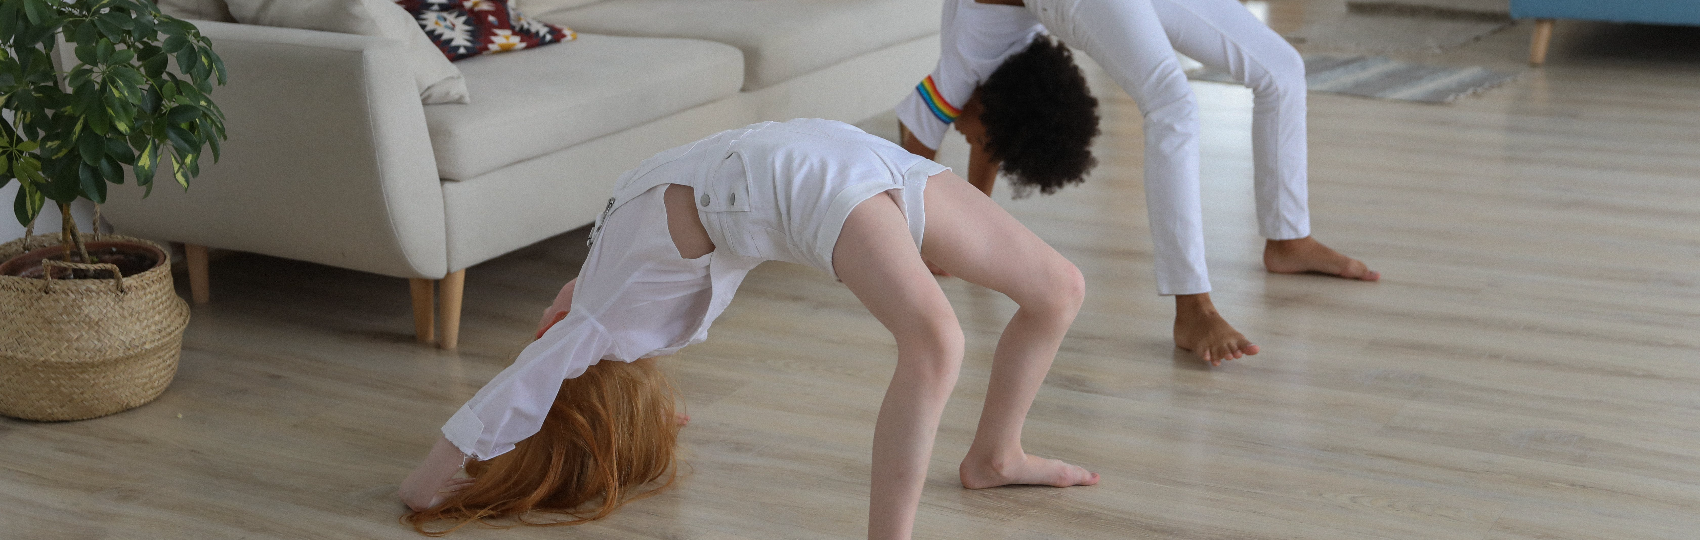
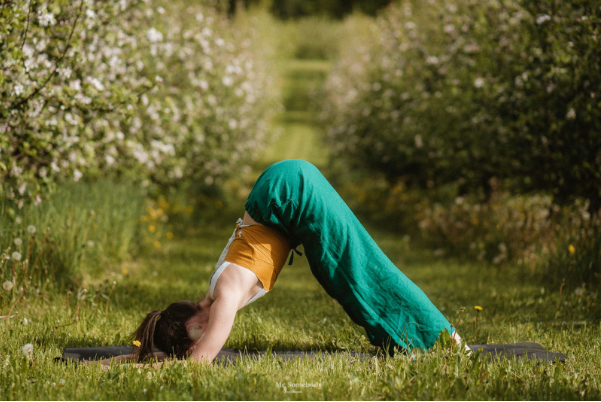
1. Downward-Facing Dog
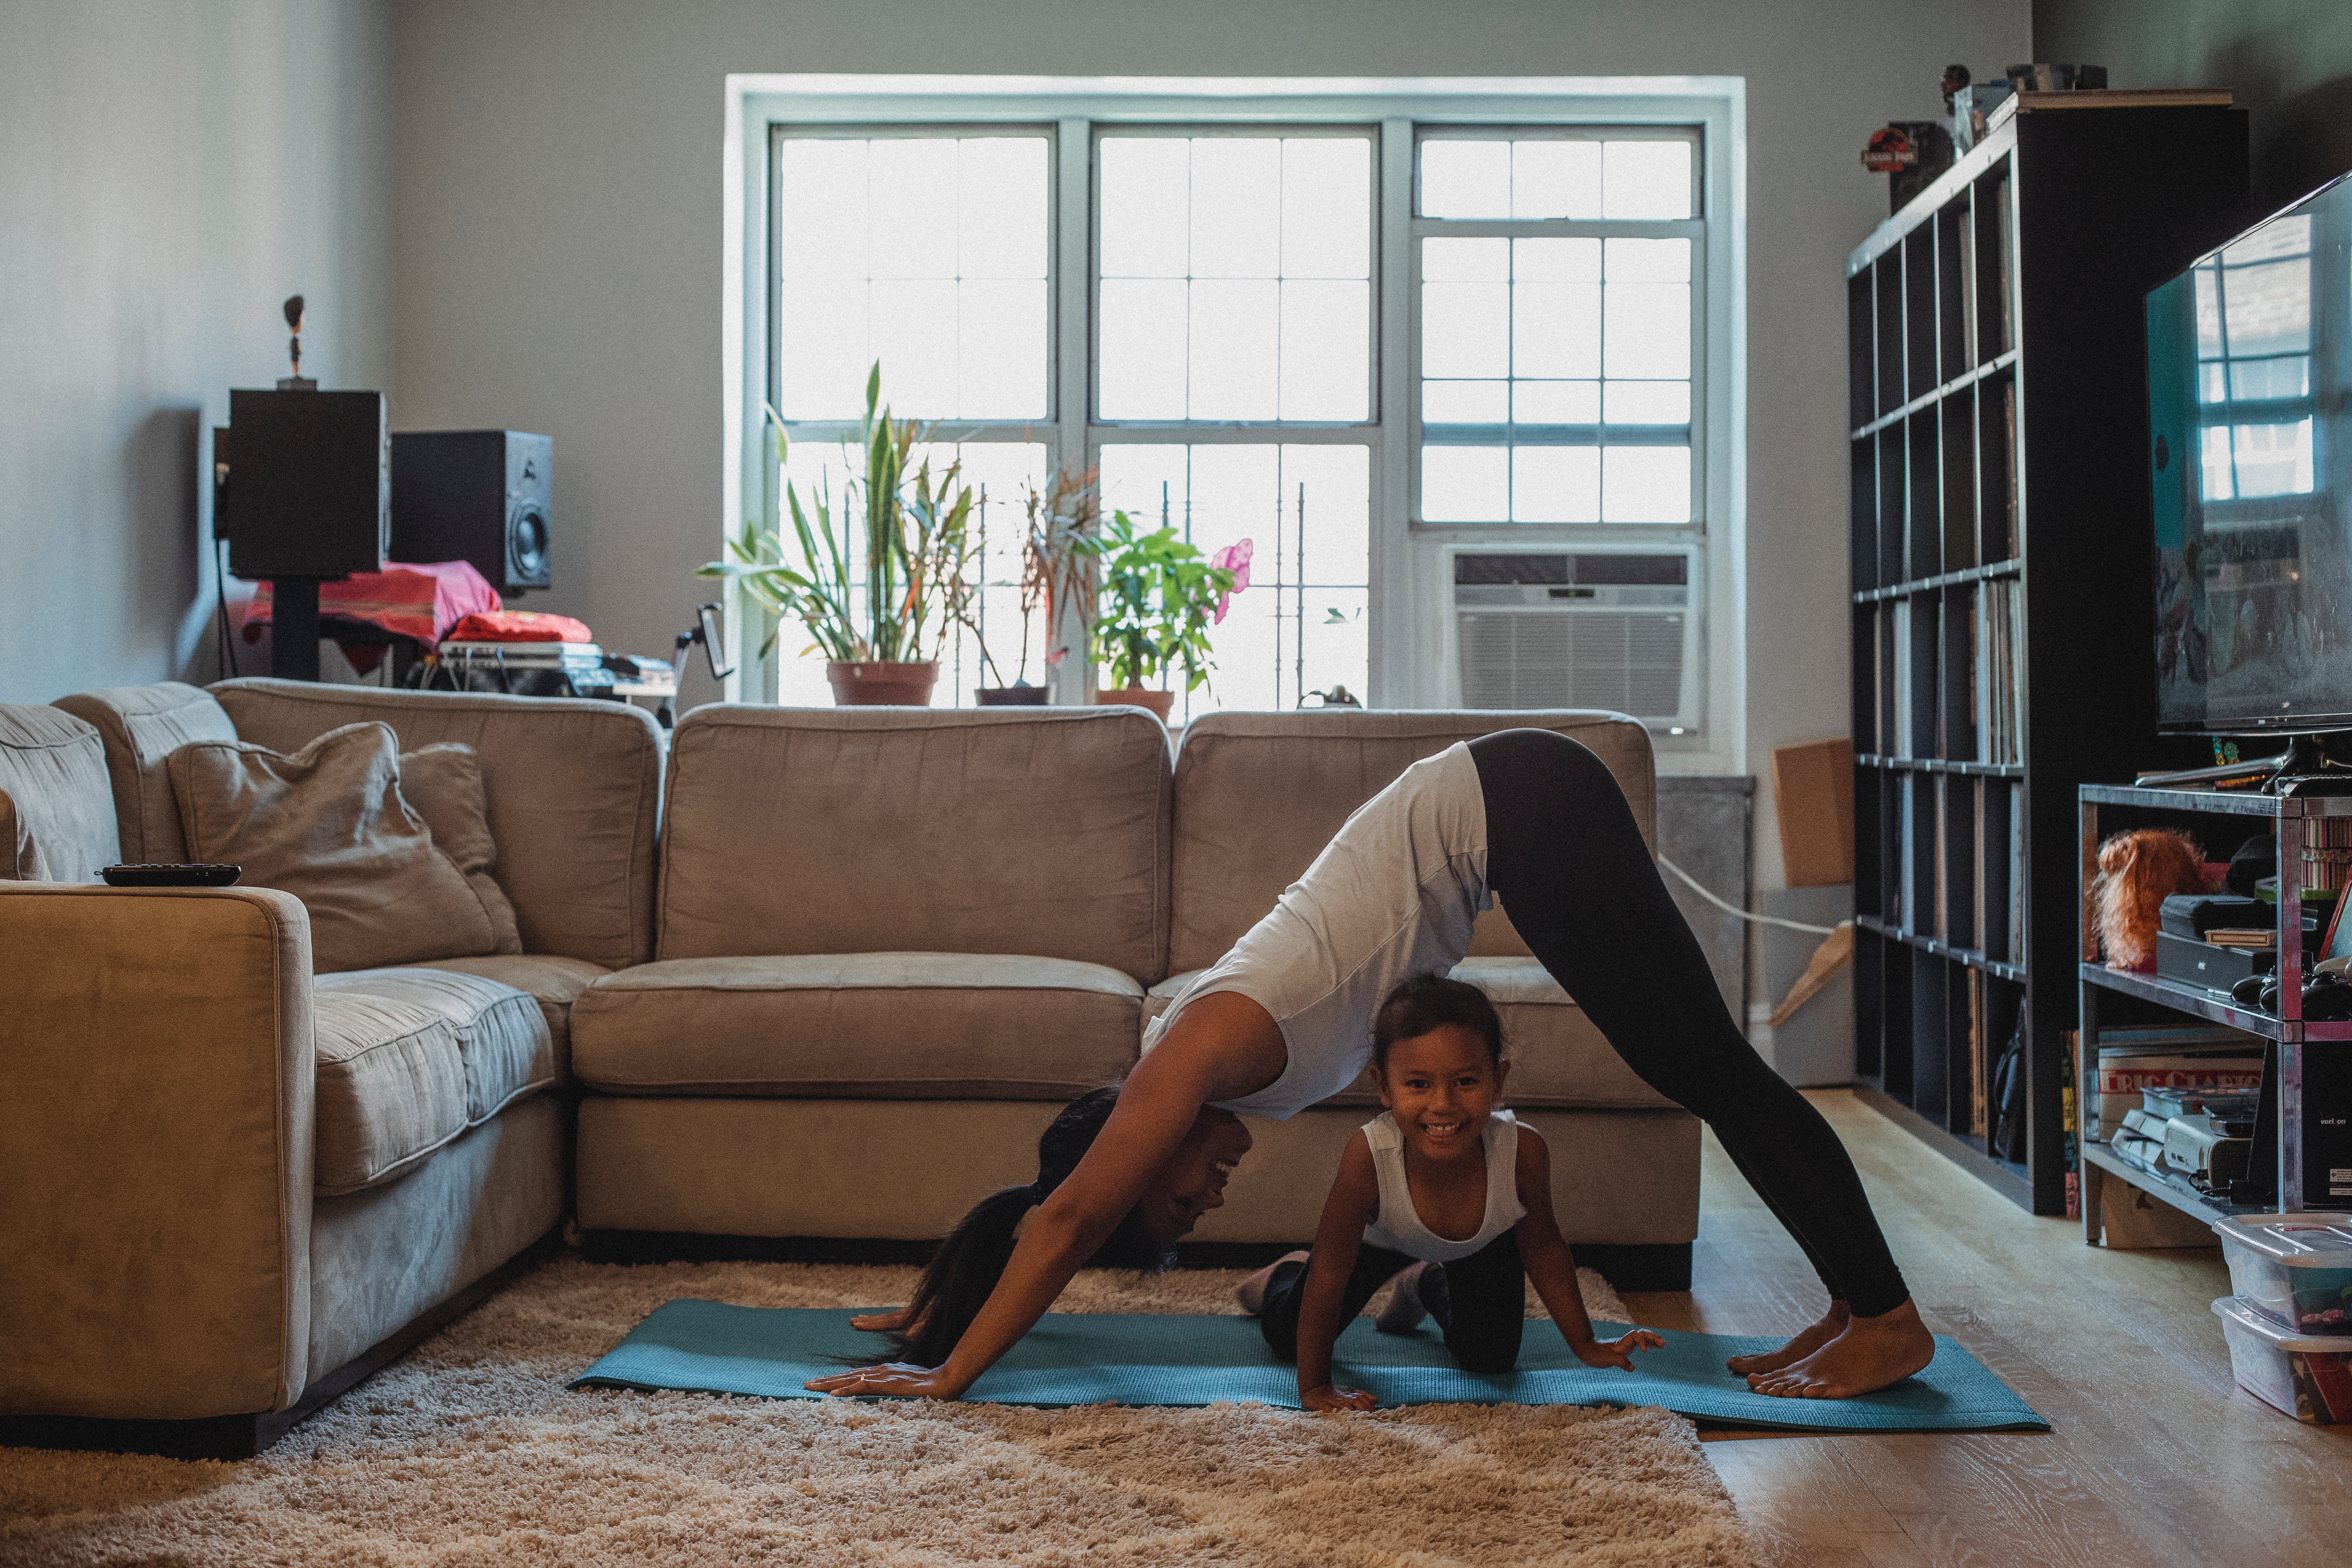
How downward-facing dog can help you build up to wheel
Strength and flexibility are essential to keeping you safe during backbends. Downward-facing dog is great for building up to wheel pose because it helps strengthen your upper body, legs, but also quite importantly—your shoulders.
When you’re in downward-facing dog, you should be pushing your shoulders further from your ears. This helps grow strength, stability, and integrity in the shoulders, an integral part of wheel pose. Downward-facing dog also stretches the legs, back, chest, and shoulders.
How to do downward-facing dog
From a tabletop position, push your hands into the mat and straighten your legs. You’re making an inverted “V” shape with your body. Press your palms into the ground and outwards (like opening jar lids!) and create some space between your ears and shoulders.
Drop your head and gaze toward your navel to increase the stretch in your spine.
You can do your downward-facing dog led by Rachel in this sweet tutorial breaking down the pose.
2. Dolphin Pose
How dolphin pose can help you build up to wheel
This pose opens the shoulders and upper back and lengthens the spine, which are important for getting into wheel. It also stretches the hamstrings, while consistent practice could help strengthen your core.
Dolphin is challenging, so don’t worry if you can’t do it, even though we’re talking about it as a warm-up. You can do dolphin against a wall as a wall hang variation.
How to do dolphin pose
From plank, lower yourself onto your forearms. Raise your hips and start walking your feet toward your elbows. Keep your tailbone tucked in and press into your forearms to create some distance between your ears and shoulders. Press your heels into the floor to stretch out the back of your legs. It’s like downward-facing dog, but on your forearms!
If you want to try dolphin pose against a wall (wall-hang dolphin variation), measure the distance between yourself and the wall to be about the length of one leg. Lean forward far enough so that you can place your forearms on the wall. Start to walk your arms down as you hinge at your hips. Come to a place where you feel the stretch in your shoulders. You might come to a place where the angle at your hips is about ninety degrees and your torso is parallel to the floor.
Take it gently, go as far as you’re comfortable, and feel the good dolphin or these variations do for your body.
3. Lunge
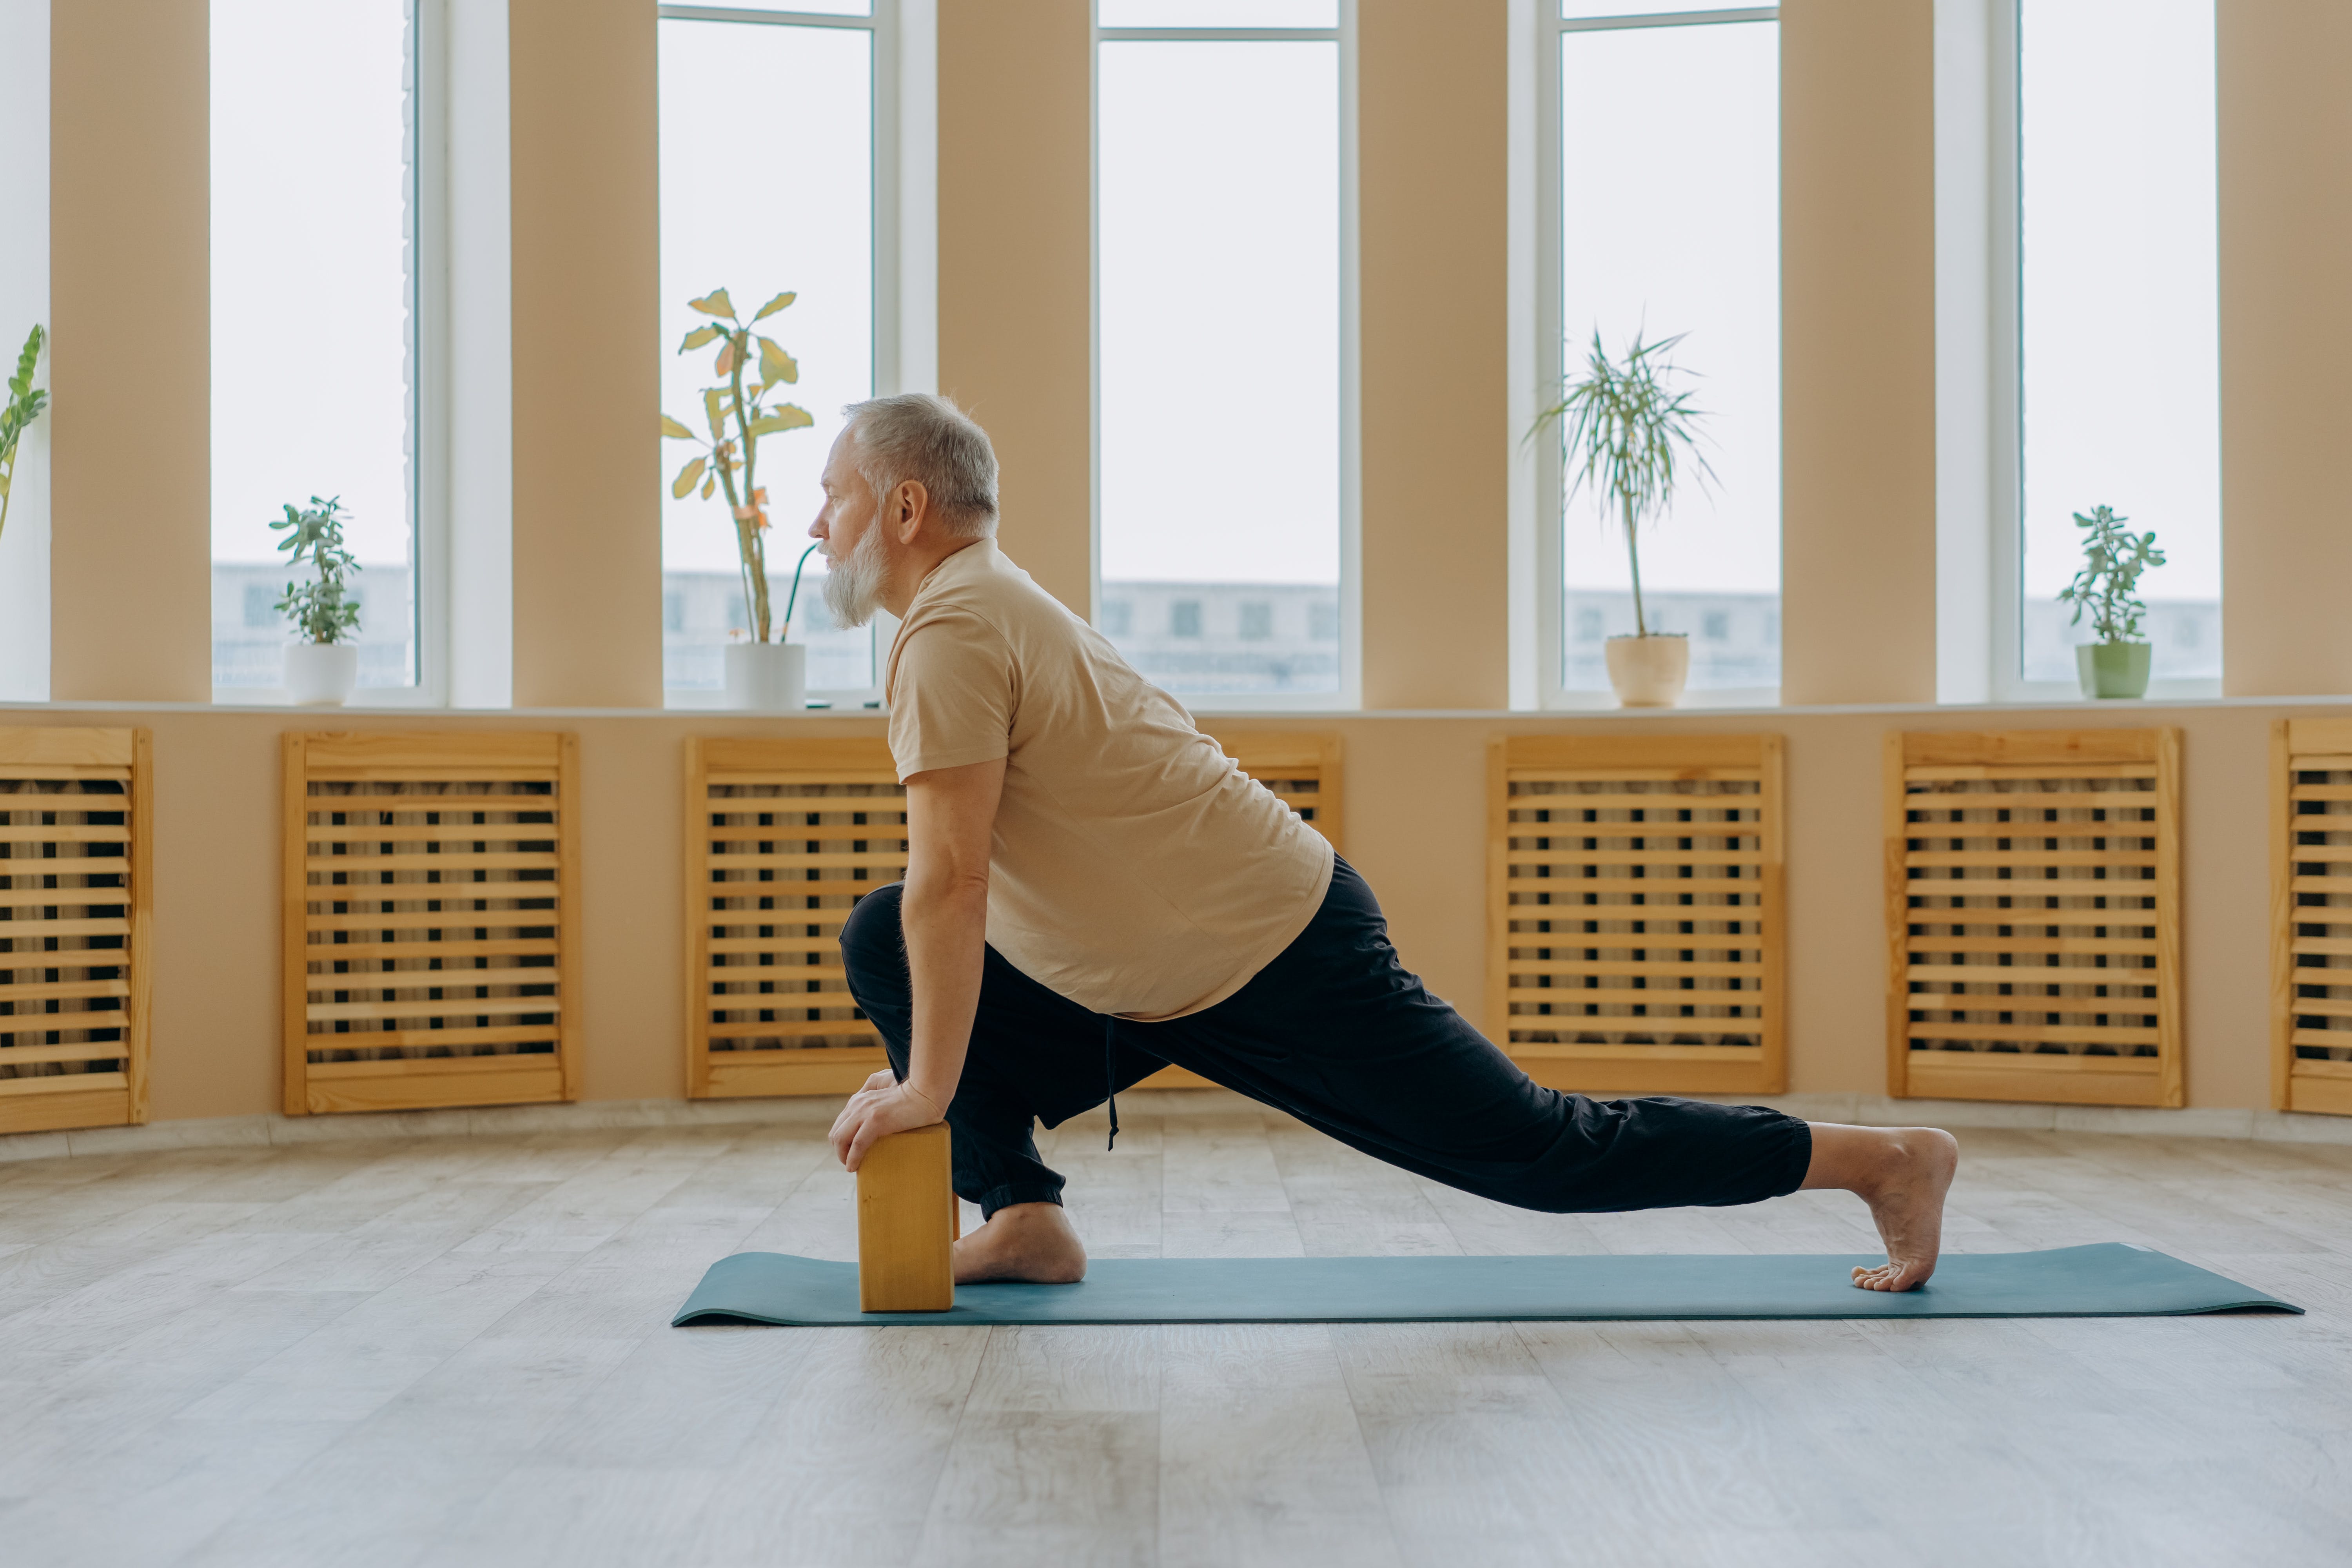
How a lunge can help you build up to wheel
Any thigh stretch allowing you to feel the stretch in the top of your thigh is a great choice to prepare for wheel pose. While people often focus on the hands and the back, flexible legs and hips are integral to getting into wheel.
Lunge pose can strengthen your thighs, glutes, groin, and knees, as well as stretch out your psoas, quads, and hamstrings.
Low lunges also release the hips. Keeping your hands on your thigh or raised may encourage more of a backbend and could open the shoulders somewhat.
How to do a lunge
Adopt a low lunge position with one knee on the ground and the other knee roughly above the ankle—according to what feels comfortable for you. Rest your hands just below the top of the knee. Deepen this stretch by pressing your hips forward.
You can take the stretch even further by raising your back foot while the back knee stays grounded, bringing the heel toward your bum and taking hold of your heel. Gently draw the heel toward your bum.
4. Cobra
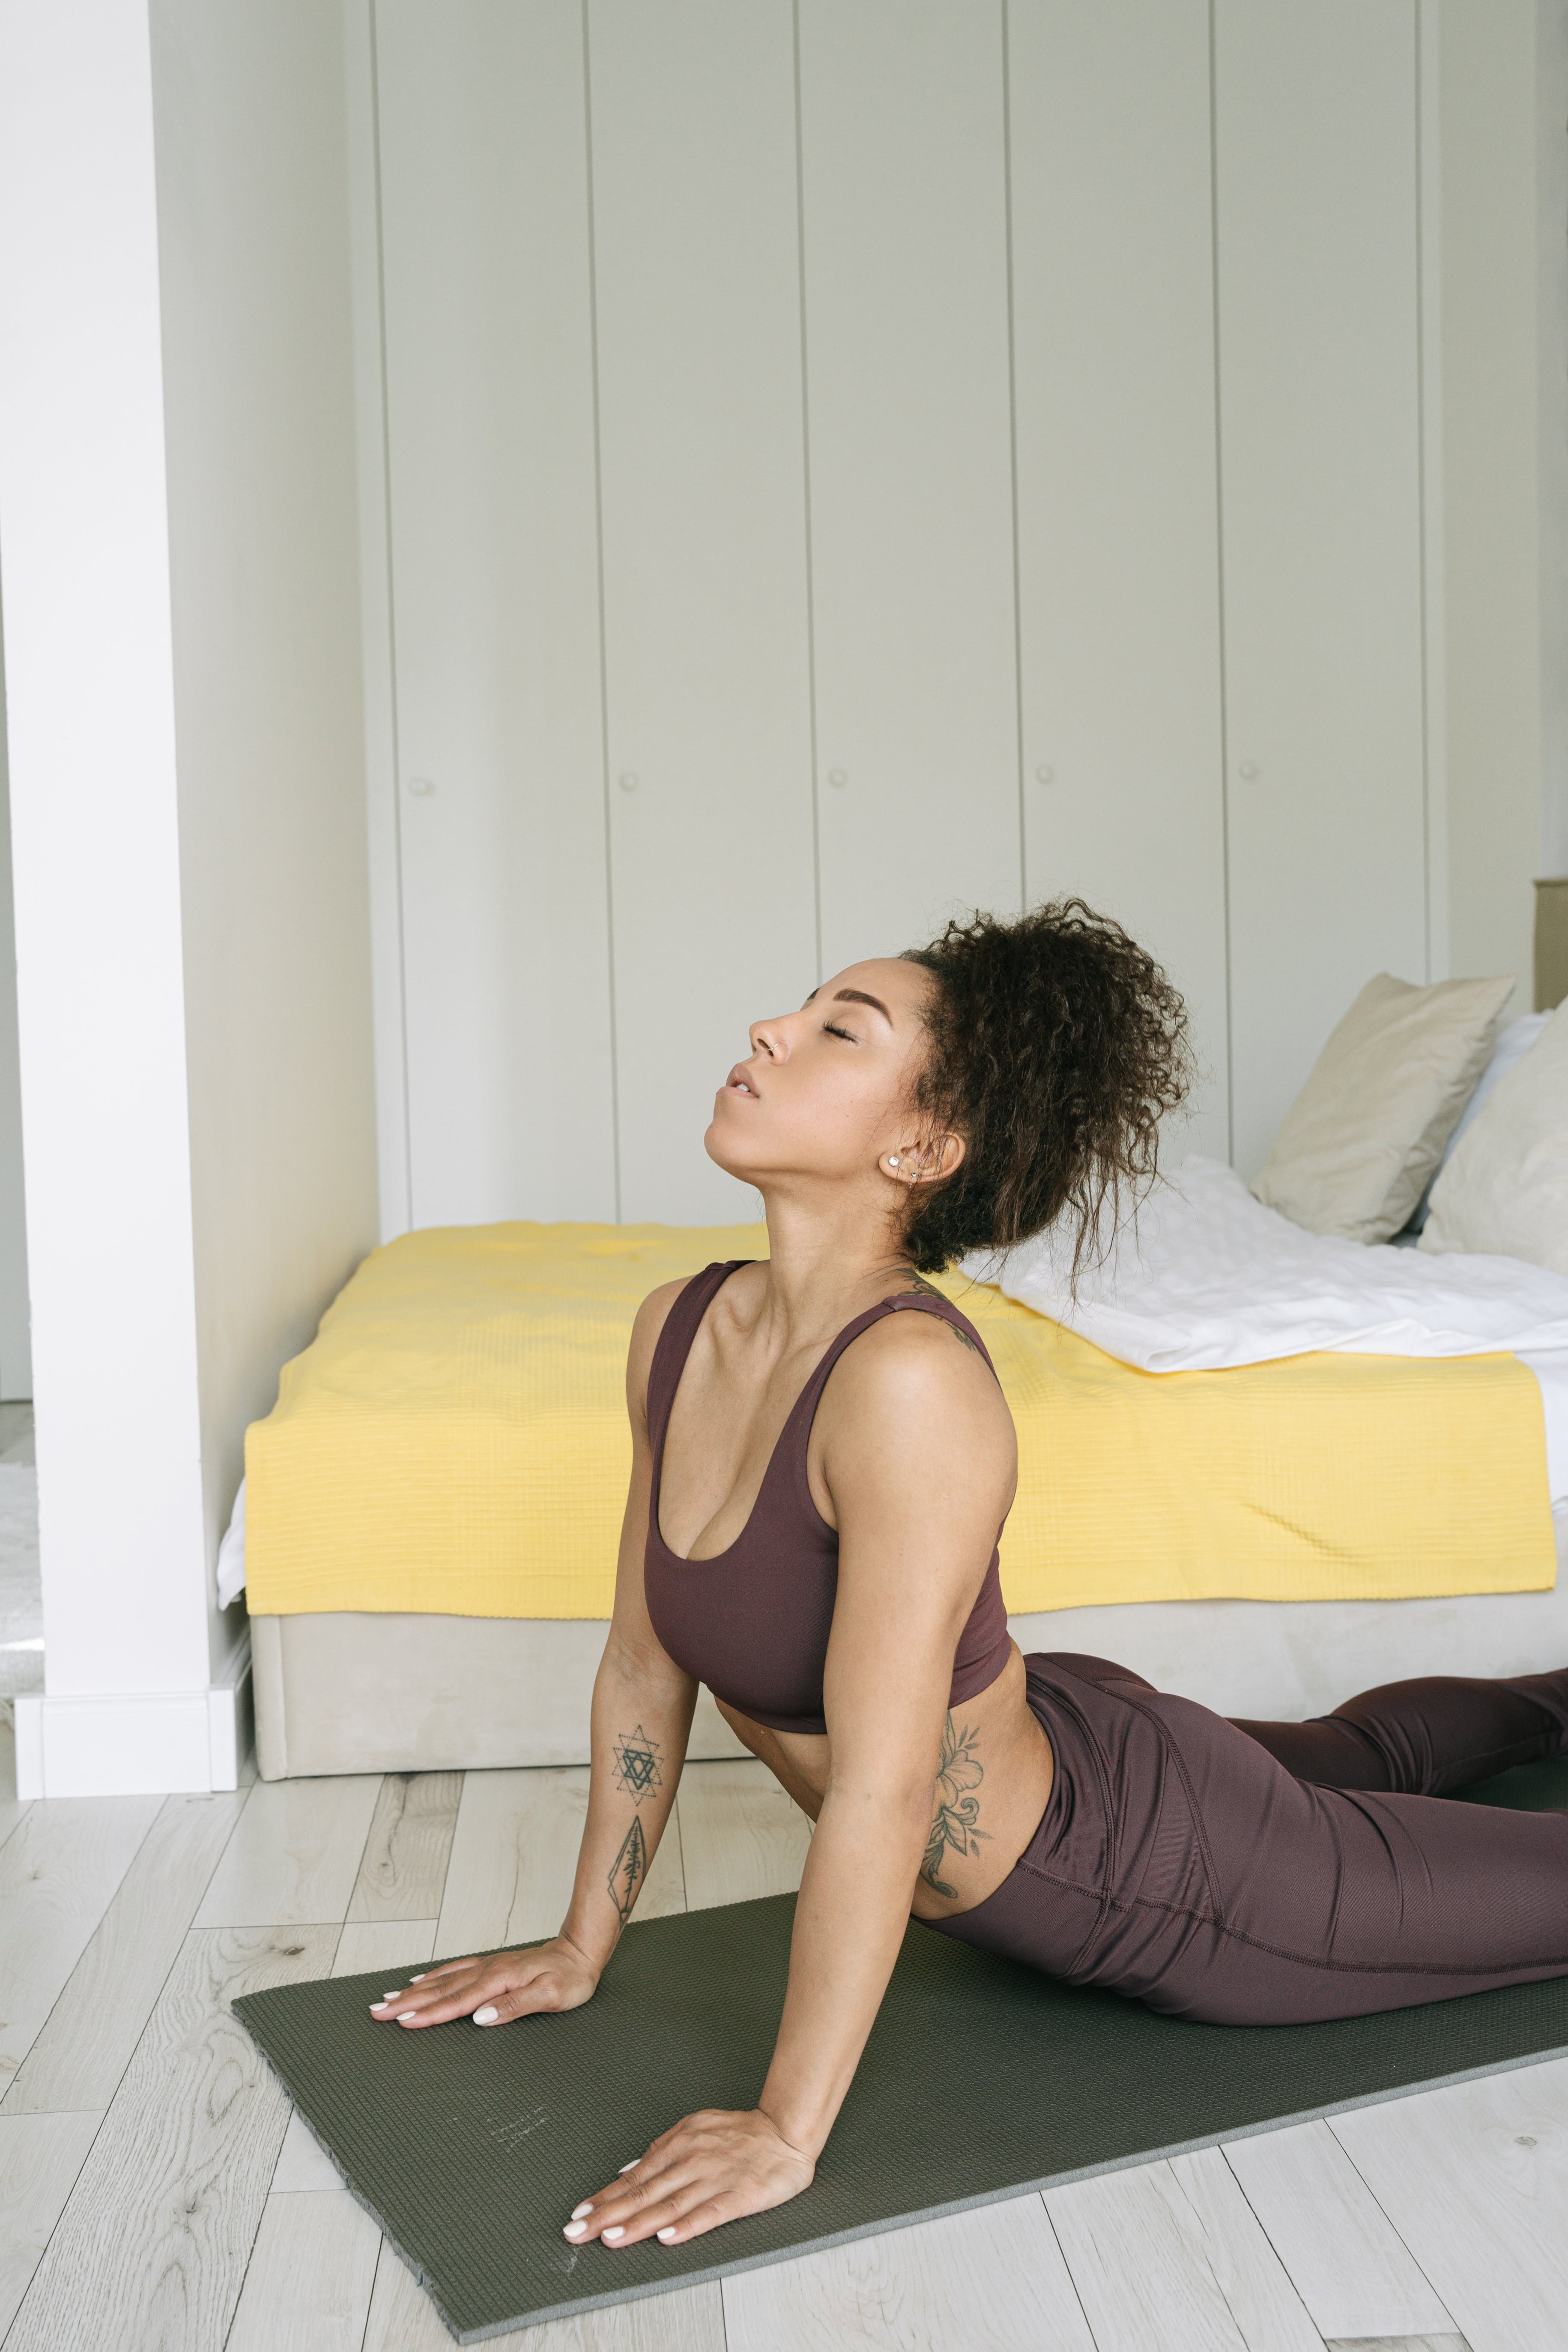
How cobra can help you build up to wheel
Cobra helps you condition your upper body for backbends. It will stretch and strengthen your abs, pectoral muscles, arms, shoulders, and back. It’s also fantastic for building spinal flexibility.
While this is a familiar pose for many people, stay focused so as to get the most out of this asana and avoid discomfort or injury.
How to do cobra
Lie on your stomach on the mat. Bring your hands on the floor on either side of your chest and press into the mat to lift your upper body, while your hips maintain contact with the mat. Engage your legs by firming up the quadriceps and pressing the tops of your feet into the floor.
Make sure you’re not relying on your arms to do all the work – engage your back and witness its potential in this pose! You can keep your elbows bent at your sides, pulling them down towards the ground to engage the back more. Alternatives include straightening the arms and even releasing your head back.
You can also refer to Fiji’s step-by-step cobra tutorial.
5. Camel Pose
How camel pose can help you build up to wheel
Camel looks similar to wheel and is a great preparation. It stretches the front of your body and strengthens your back muscles. When you’re comfortable with cobra, camel pose might help you deepen the stretch you feel and improve your ability to do backbends.
How to do camel
Begin in hero’s pose, sitting atop your feet, knees slightly wider than hip-width apart. Engage your glutes and press your hips forward to raise your body and “stand” on your knees. Toes can be tucked under or not, depending on your flexibility. Bring your hands just above your bum, and, using them for support, slowly and gently lower your body backwards. Place one hand and then the other on the corresponding heel. If you feel comfortable, drop your head back for the ultimate neck stretch.
A more comfortable approach that’s easier on your back might be to keep your hands on your lower back for support as you slowly and gently backbend your upper body. Alternatively, you can perform the pose by leaning back with one hand at a time.
6. Bridge Pose
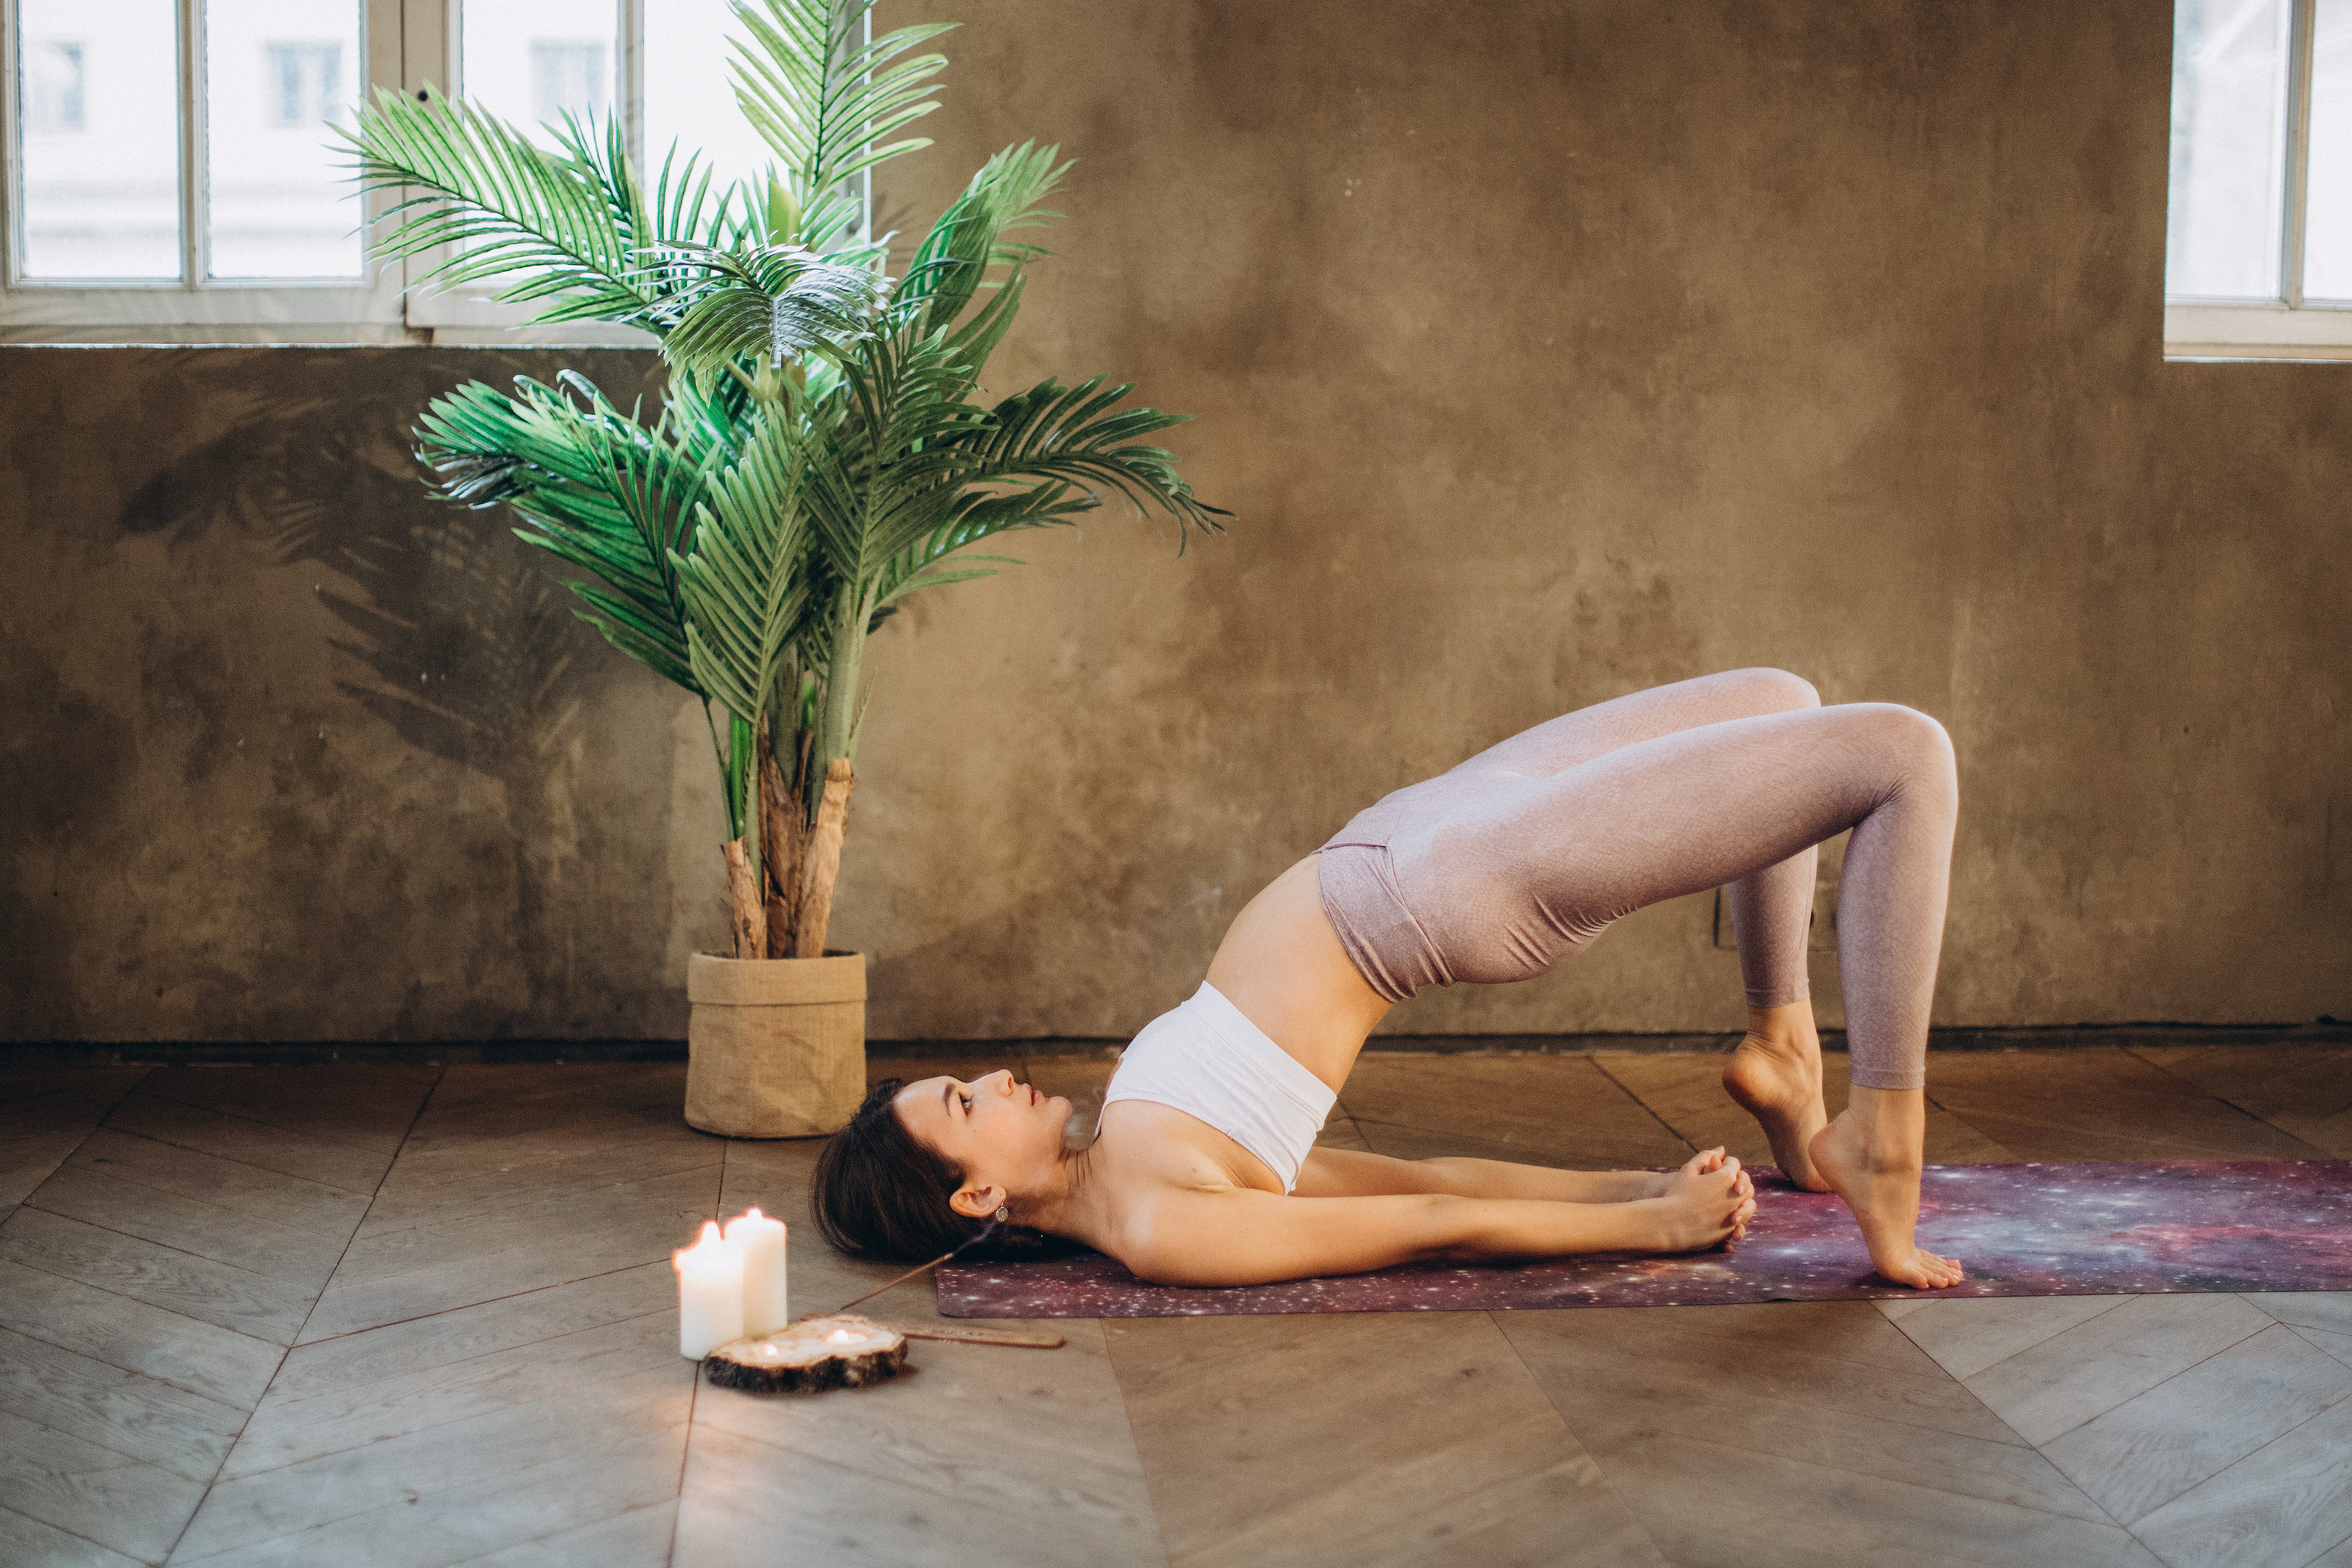
How bridge pose can help you build up to wheel
This pose can strengthen your core, lower body, spine, lower and upper back, as well as shoulders—all of which can help protect you from injury when moving into wheel pose.
How to do bridge pose
Aim to keep your knees hip-width apart throughout the movement. From a supine position, engage your legs and glutes to raise your hips. Don’t forget to engage your back muscles, as well! Push your arms and shoulders into the mat to lift your chest toward the ceiling. Your arms can push into the floor next to you, straight or bent at an 90-degree angle at the elbows, they can hold your heels, or can be bound below your body.
7. Bow Pose
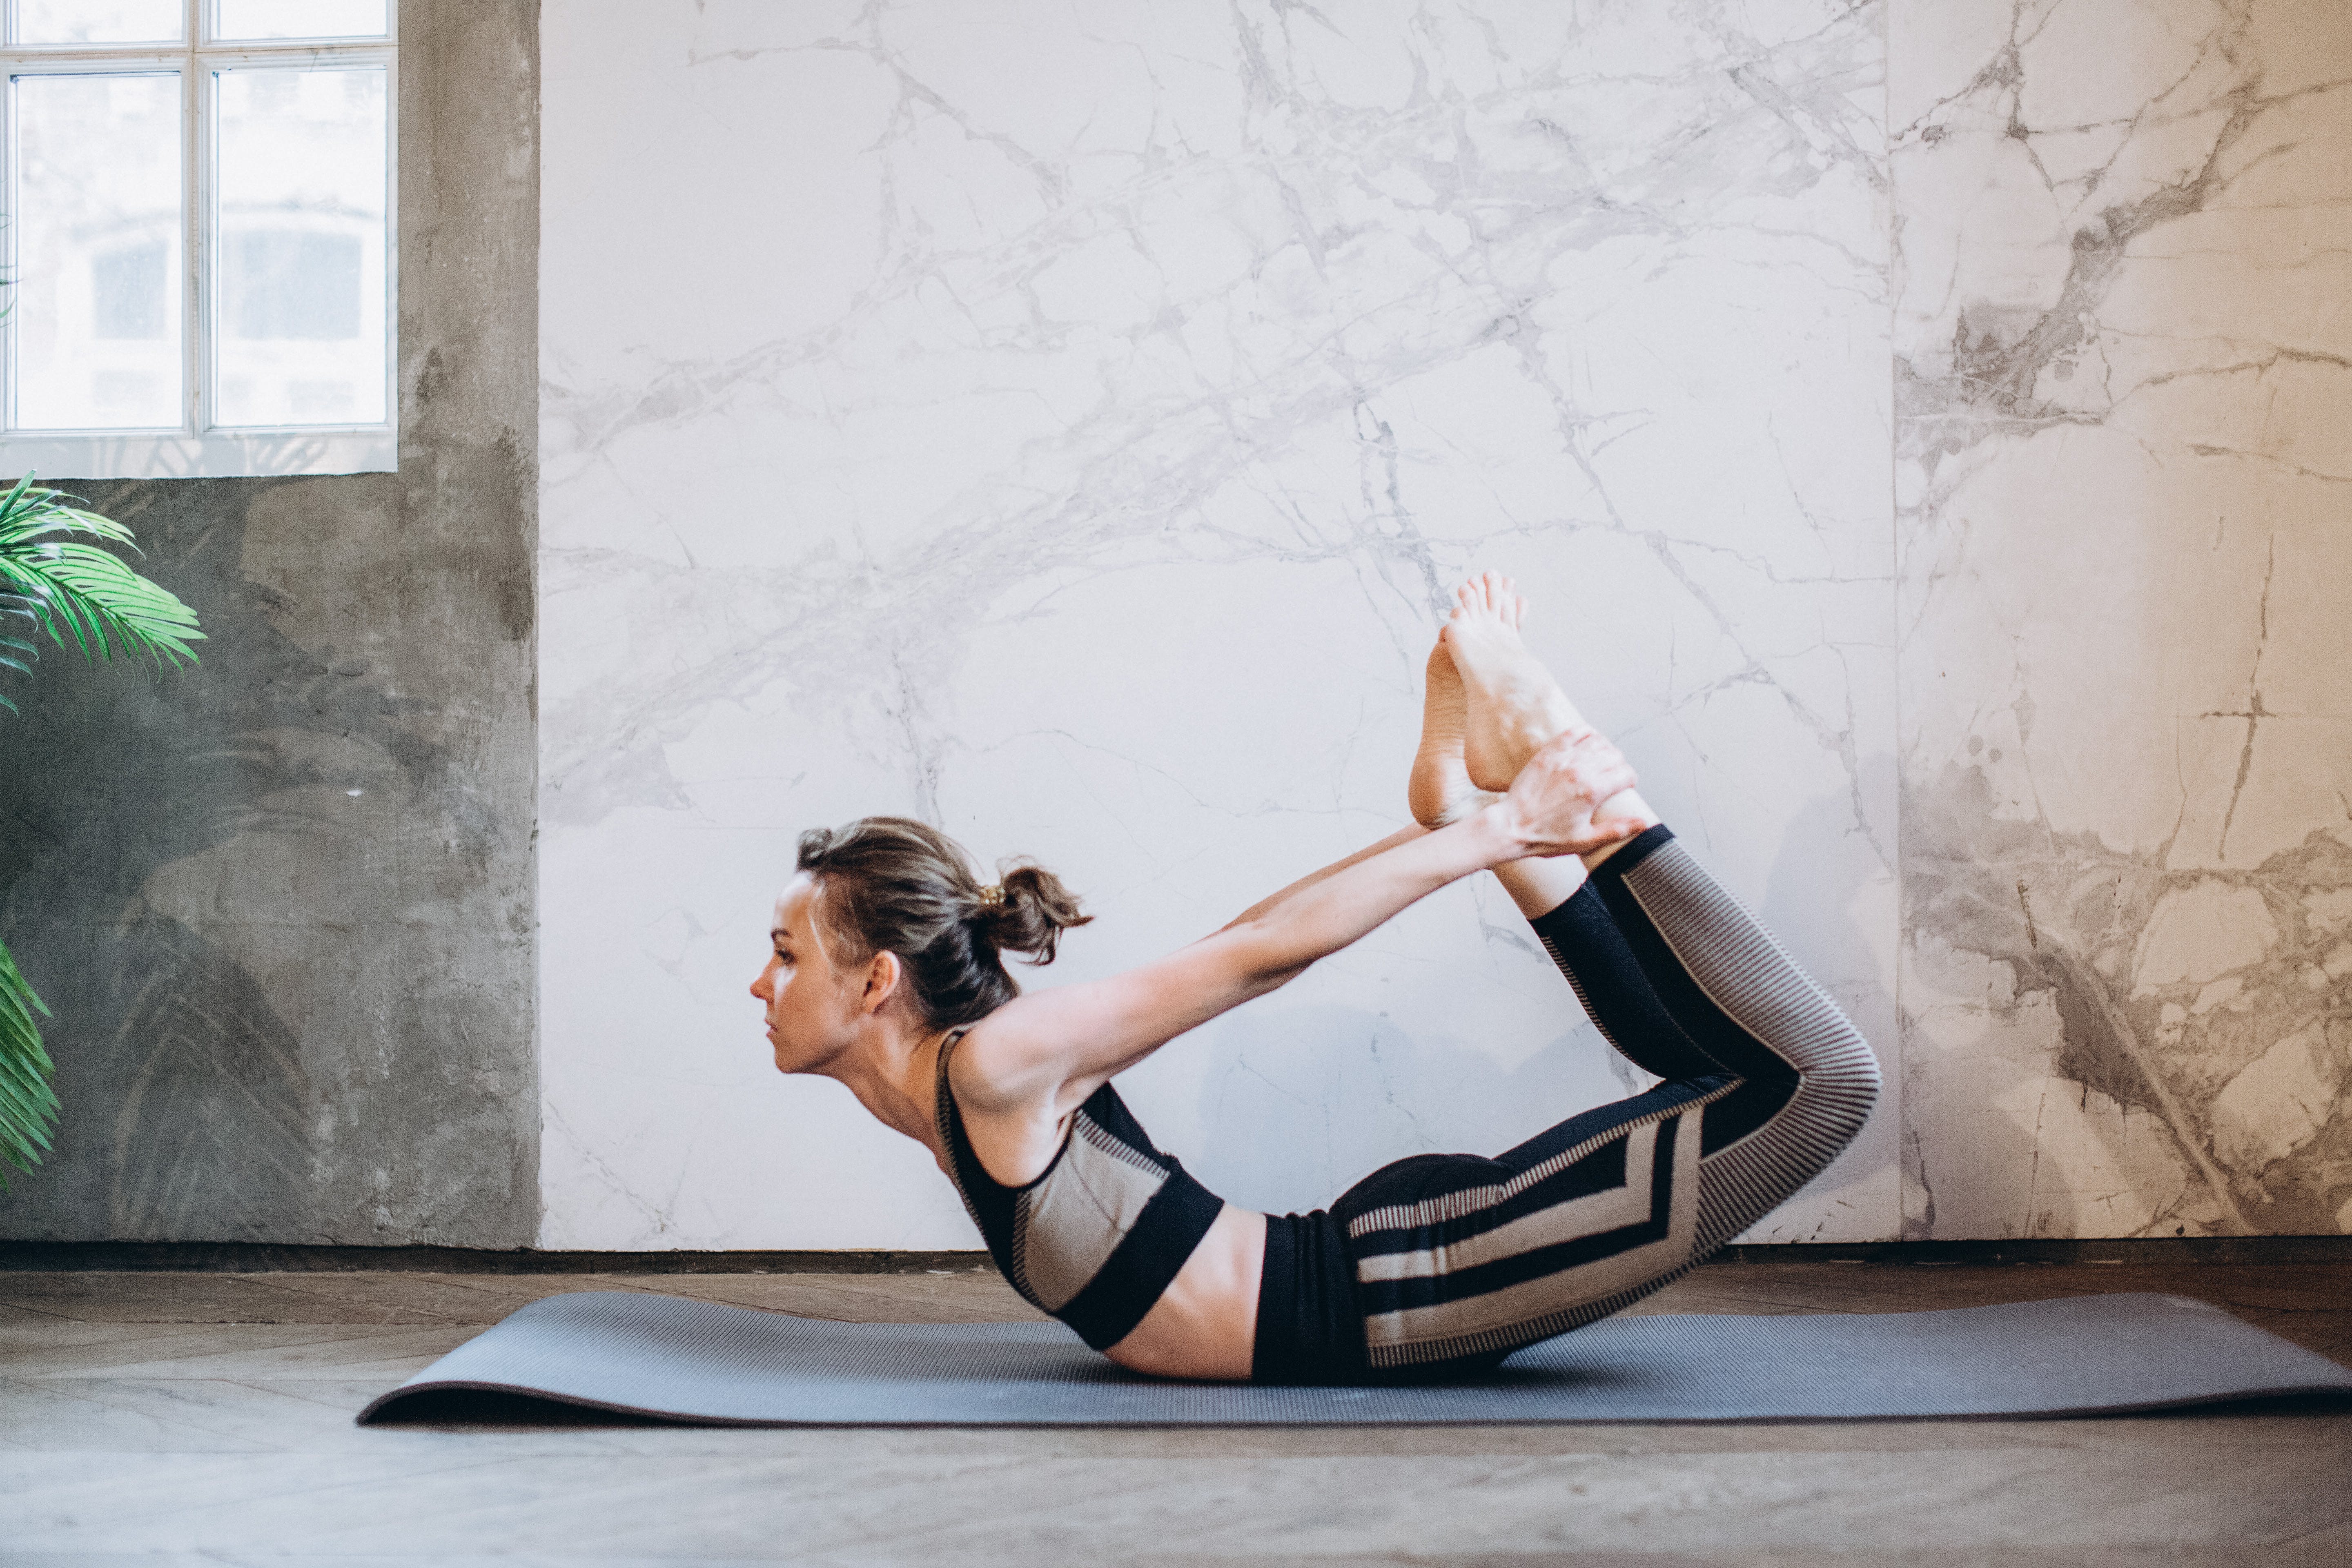
How bow pose can help you build up to wheel
This is another excellent pose for building up to wheel. It’s great for spinal flexibility, stretching the legs, and releasing tension in the upper back and neck.
How to do bow pose
From a prone position, bend your knees, moving your heels towards your bum. Reach for and grab both ankles with your hands from the outside(or use a strap). Bring your knees toward each other and then, when you’re ready, inhale as you lift your chin and chest from the mat. Pull your ankles with your hands and your hands with your ankles to get a nice stretch.
Tips for Getting Into Wheel Pose
Now that you’ve finally opened up your body to the possibility of wheel pose, here are some neat tricks to keep in mind:
- Ensure you fully engage your muscles when pushing up from the mat. It may surprise you to realize how weakly engaged certain muscles are without actually feeling them.
- Placing your hands wider than shoulder-width apart can create more room for you if you’re a beginner or you have tight shoulders and pecs to lift.
- Having your hands in the correct position will help your balance and support your weight—really turn your wrists so that your fingers are pointing toward your feet, but more out to the sides might feel best for some if your shoulders are tight.
- See if you can keep your knees at hips-distance apart to maintain your stability. If not, you can increase the distance between your feet if that’s more comfortable and achievable. Holding a yoga block between your knees can help you keep your knees less than hip distance apart, but note that performing wheel this way will require a lot of hip/psoas flexibility, so most people can consider this something to work toward. Do so carefully to avoid compressing your lower back.
- Work toward keeping your toes and knees pointing forward, not off to the sides.
- It’s not about engaging every muscle you own— relax your neck.
- Great technique and the right motivation isn’t necessarily enough for you to achieve wheel pose—you need to take time to condition your body. If you’re not reaching wheel pose or your wheel pose doesn’t look and feel right, this may be down to a lack of flexibility and openness, particularly in your chest, shoulders and quads. ‘Flexibility’ differences might also have to do with bony structures like vertebral shapes and sizes.
Be Gentle With Yourself
As you embark on your journey toward wheel pose, it makes sense to open and strengthen your body, especially the parts you’ll be relying on most during wheel pose: your spine, thighs, shoulders, back, and chest.
However, the people we see in most wheel pose images are often hyper-flexible people, including current or former dancers and gymnasts. Many have 'hinges' in their backs, which are vertebral anomalies where some of the bony structure is actually missing, allowing for greater range of motion, so try not to compare your wheel to stock images you see in magazines and on the internet!
Doing wheel pose doesn't make you a better person or yogi.
Some people can work to get there. Others just may not be able to do wheel pose or may need variations and a lot of support.
Either way, it’s okay!
Wheel Pose Routines
Fiji, Tracey, and Rachel have great warm-up routines that incorporate the same or similar poses with detailed guidance that comes from years of experience and empathy!
They will help you work up to a strong and stable wheel pose. Just choose the style and approach that suits you best. Or, try them all!
Note that all of the following classes are free to all subscribers.
1. Wheel Pose
In this short, intermediate-level tutorial, Fiji demonstrates how to attain wheel pose. She has great advice for safety and doesn’t just show you how to get into wheel pose, but suggests ways to shift your body and awareness once you’re there.
2. Workshopping Wheel Pose
This awesome class, Fiji takes you through a challenging flow divided into three sections that will each help you build up to wheel, the peak pose of the session.
The first section is the warm-up. You should try this several times and stop there until you feel ready to attempt level 2.
In the second section, you move into wheel pose. Take as long as you need with the warm-up and section 2, whether that is weeks or months. The important things are to make progress safely and perform the pose effectively.
In the third section, Fiji takes you through ways to deepen your wheel pose.
3. Wheel Pose: Open the Heart
Tracey starts this wonderful session with mindful breathing; a fantastic way to prepare both the body and mind for wheel pose or whatever else your day may hold.
“Let go of what is not needed right here, right now, and already the work has begun... making the space for the inner body to blossom and the outer body to receive.”
At the end of this practice, you can decide whether you’re ready for Tracey’s next class, which leads you to full wheel pose.
4. 5 Poses to Wheel
Despite being only 16 minutes long, Rachel takes you through a carefully considered and meticulously detailed flow through five poses, opening and stretching the whole body to prepare you for this significant backbend. She then demonstrates wheel pose not once, but twice, with helpful guidance every step of the way.
In the comments of this video, she gives the following advice to yogis encountering the common problems of struggling to get onto their heads or finding the strength to push themselves up using their arms.
“Take your hands wider. Turn your hands out. REALLY plug your shoulders on your back (think bridge, then place your hands).”
“Use your legs more; the power of the legs—combined with the pulling IN of the upper back - is what makes you go up.”
This is excellent advice for many reasons. Often, we focus on one part of the body when holding a pose, and forget that all our muscles work in harmony to achieve what we ask of them. So, don’t forget to use your back muscles in cobra, but also don’t forget to use your legs in wheel!
Coming Full Circle with Wheel Pose
Attaining wheel pose can be a great achievement, demonstrating the growing harmony of your body and mind. It’s a fantastic stretch for many parts of the body and it helps you become stronger. It also looks cool.
However, every day that you get on your mat and do yoga is a celebration of your body and mind, even if you’re feeling weak or out of balance. You don’t have to do wheel pose to be a yogi. Don’t let anything gatekeep your comfort in the practice and the community!
As Fiji demonstrates, raising your body from the mat isn’t the end of your wheel pose journey: rather, it’s a new beginning. There are plenty of places to go from there.
Comments
Existing Comments